
 ENG
ENG
 English
 中文简体
中文简体 русский
 Français
 Español
 عربى
عربى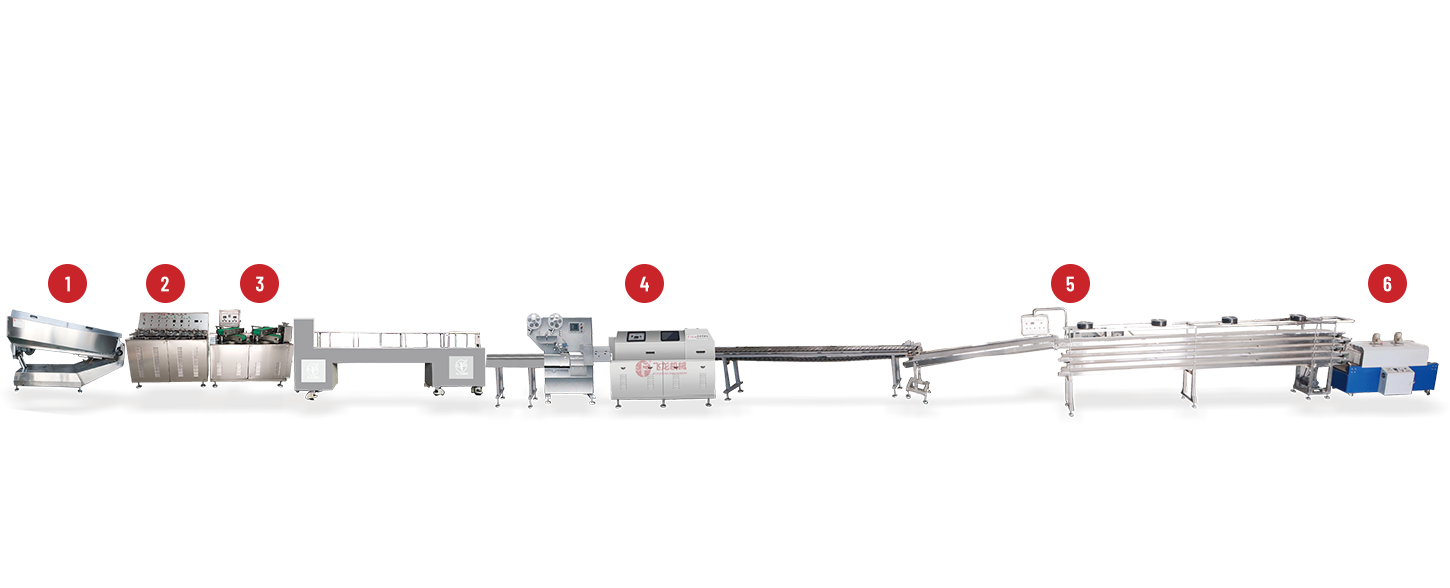
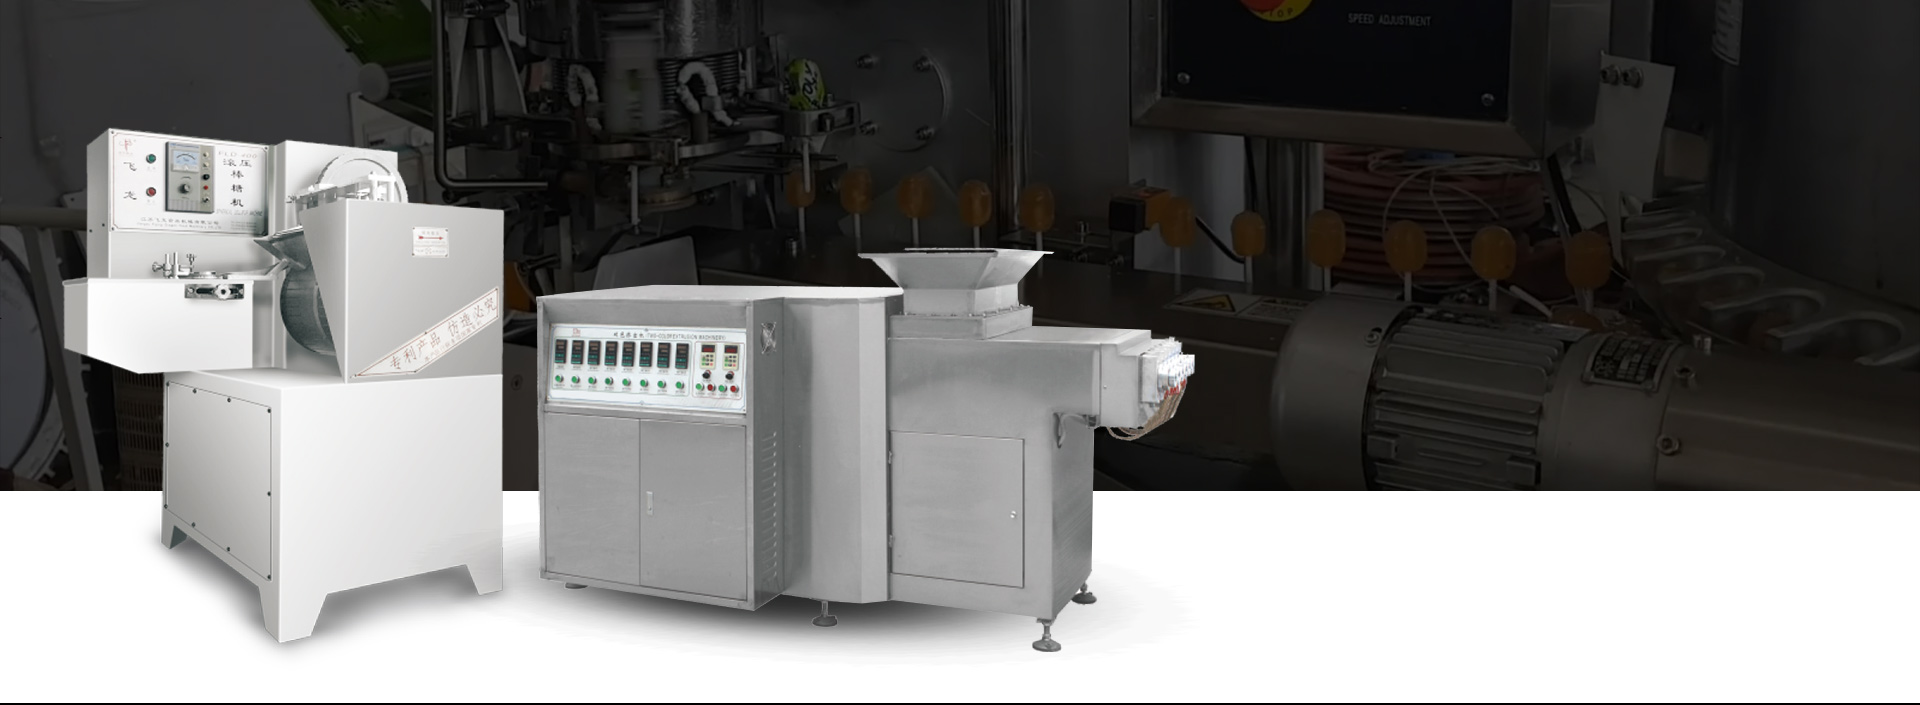
How a Milk Candy Machine Helps Small Candy Makers Work Smarter
If you run a small confectionery, or you're thinking of starting one, you've probably wondered where to invest first. A Milk Candy Machine can feel like a big decision. It's not glamorous equipment — it won't win you Instagram followers on its own — but it does the job that matters every day: it makes your production predictable, reduces manual stress on staff, and opens space for new flavors and shapes.
Why small producers choose a machine: real world payoffs
Let's not pretend the machine sells itself. You're deciding whether to add a dedicated device to a kitchen that's already crowded. So here's what owners care about, in plain terms:
- Repeatability. When you need 1,000 identical pieces for a weekend market, handwork struggles. The machine gives the same portions, same shape, batch after batch. Customers notice the consistency.
- Throughput. One operator can manage a machine that makes hundreds of pieces per hour. That frees skilled staff for packaging, quality control, or recipe development.
- Less waste. Precision in dosing reduces scraps and off-spec pieces. Over time, that saves raw material and money.
- Cleaner process. Modern units are designed for hygienic cleaning cycles; less manual handling means fewer contamination risks.
- Creative flexibility. Once you can consistently produce one form, branching into new flavors or fillings becomes easier.
A simple example: a small shop I worked with went from producing 200 hand-made pieces a day to 900 with one operator running a forming and cooling machine. Their sales window expanded from weekends to weekdays because they could reliably meet demand.
The settings that really matter (and how to tune them)
You've got a machine. Great. But the secret to good candy isn't just the machine — it's the settings you dial in.
Temperature control
- The health of a milk-based candy hinges on temperature. Too hot and sugar scorches, leaving bitter notes. Too cool and the mass won't flow well or will set too quickly.
- Aim for steady ranges rather than heroic spikes. If you watch the dial bounce during a shift, something's wrong — often an inaccurate thermostat or a clogged sensor.
Use an infrared thermometer to spot-check surface temps. It's quick and will save guesswork.
Dwell time / cook time
- How long the mass stays at cooking temperature affects texture. A few minutes more or less changes viscosity and crystal size.
Agitation / mixing speed
Mixers and agitators impact crystal formation and mouthfeel. Slow, even motion often produces smoother results for milk candy.
- Don't assume faster is better. For milk solids and sugar systems, gentle mixing can give creamier results.
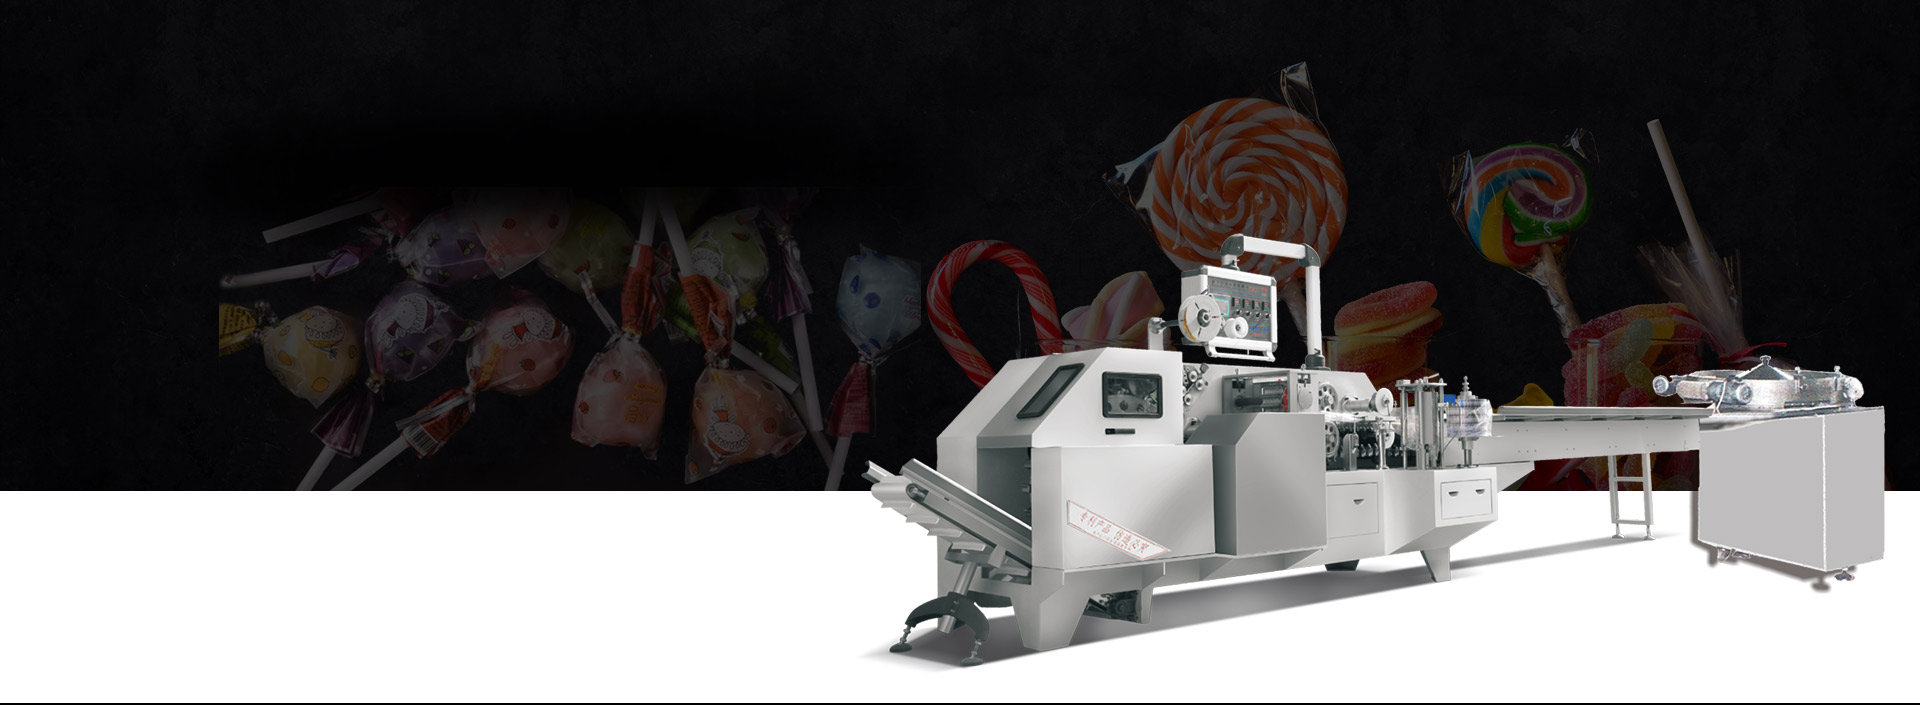
Pouring and forming rate
If you pour too fast, portions will merge or shapes will be inconsistent. Too slow and the surface may skin over.
- If your machine has adjustable nozzles or volumetric dosing, mark settings that work for each recipe. Create a simple chart by recipe name.
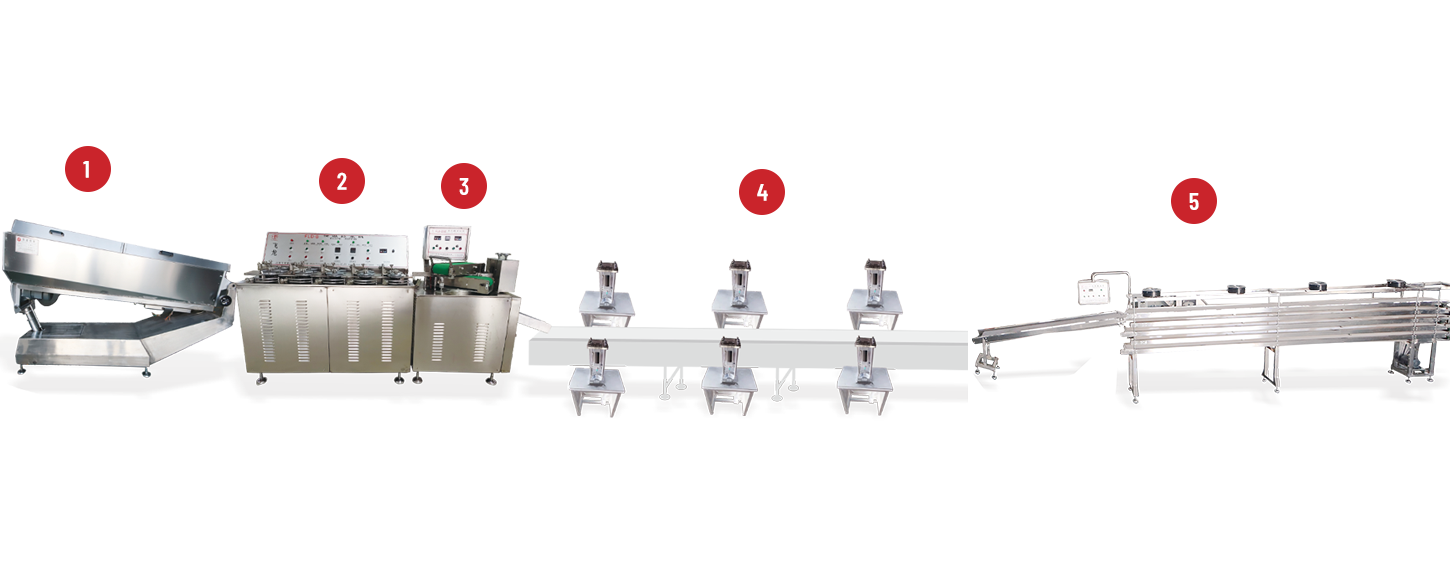
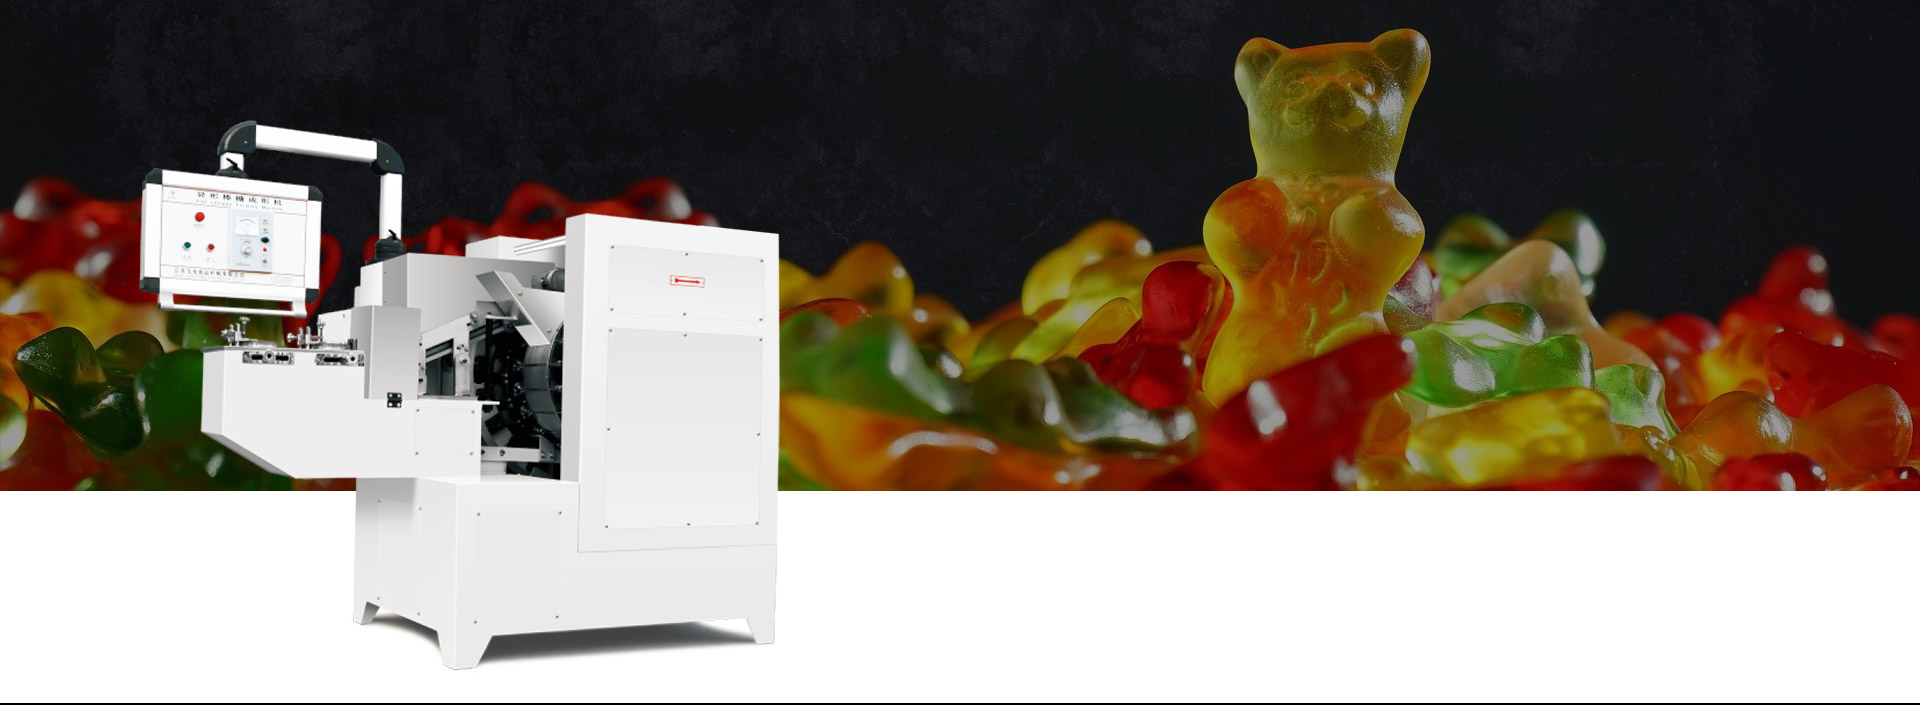
Cooling profile
How quickly the candy cools affects shine and bite. Forced air cooling, chilled conveyors, or ambient room differences all alter results.
- Keep a consistent cooling environment where possible. If you can control the conveyor temperature, note the setpoint for each product line.
| Parameter | Typical Range | What to watch for |
|---|---|---|
| Cooking temp | 115–125°C (recipe dependent) | Scorching, off-flavor |
| Dwell time | 3–8 min | Soft vs brittle texture |
| Mixer speed | Low–medium | Aeration vs smoothness |
| Dose rate | 1–5 sec per piece | Merging or undersize pieces |
| Cooling | 10–30 min (as needed) | Bloom or dull surface |
Small adjustments with big results — practical recipe notes
Here are the tweaks producers ask about most.
- Fat / milk solids: More milk solids yield richer mouthfeel but reduce flow. Add a fraction of lecithin or fat to improve pourability if needed.
- Sugar type: Invert sugar or glucose syrup reduces crystallization and gives a softer, chewier texture. If you want crisper results, increase sucrose ratios — but watch the tendency to grit.
- Acidity: A touch of acid (citric, tartaric) can brighten flavor and affect setting. Test in small increments.
- Humidity: In humid months, reduce open time and speed up cooling. Consider dehumidifiers in production rooms for consistent texture.
- Fillings: If you're injecting ganache or jam, coordinate the cooling so the shell forms enough to hold the filling without breaking.
The pragmatic approach: keep a recipe logbook. Every change gets a one-line note — date, temp, time, result. After a month you'll have a guidebook that saves trial and error.
Cleaning and maintenance — daily habits that prevent breakdowns
Anecdote: a shop ignored a sticky pump for three weeks. One day it failed mid-batch, and the resulting mess created a day's lost production while the team cleaned and repaired it. Preventable.
Daily (quick) checklist — 3–10 minutes:
- Wipe down surfaces and remove loose sugar buildup.
- Run a water/solution rinse cycle if the machine supports it.
- Check seals, gaskets, and visible wear.
- Ensure dosing nozzles are clear.
Weekly (more thorough):
- Disassemble forming heads or nozzles and soak in warm, appropriate cleaning solution.
- Inspect belts, chain drives, and gearbox for wear. Lubricate per manual.
- Check sensor calibration and thermocouple connections.
Monthly:
- Inspect electrical connectors and cable routing.
- Check motor brushes (if applicable).
- Replace any rubber seals showing cracks.
A well-kept machine is far more predictable. Keep a maintenance log with dates, findings, and actions. If you rent or buy used, start with a full inspection and keep records from day one.
Operator training — 20–30 minutes that save hours
You don't need a PhD to run these machines, but a short practical training session does wonders. Cover these points:
- Basic controls and emergency stop function. Everyone must know where the E-stop is.
- How to align and load hoppers safely.
- Simple troubleshooting: what to do when the pour's inconsistent, when a motor stalls, or when a sensor reads oddly.
- Safe cleaning practices: power isolation, lockout/tagout, and how to remove parts safely.
A 20-minute hands-on session, with each operator running three test batches, gives confidence and reduces mistakes that waste materials.
Troubleshooting common problems
Problem: candies are grainy.
Likely cause: uncontrolled crystallization.
Quick fixes: boost invert sugar slightly, check cooking temp uniformity, ensure mixing is even.
Problem: mass sticking to forming nozzle.
Likely cause: temperature too low, nozzle clogged, or wrong nozzle finish.
Quick fixes: warm the nozzle, use a small brush to clear, confirm recipe viscosity.
Problem: inconsistent portion weight.
Likely cause: pump slipping, air entrainment, or worn dosing mechanism.
Quick fixes: inspect pump drive, bleed trapped air, check the dosing piston or valve.
Problem: dull surface or sugar bloom.
Likely cause: slow cooling or humidity in the room.
Quick fixes: speed cooling, reduce ambient humidity, store in lower-moisture packaging.
Practical note: document every fix. When a problem recurs, your notes will point to a root cause faster.
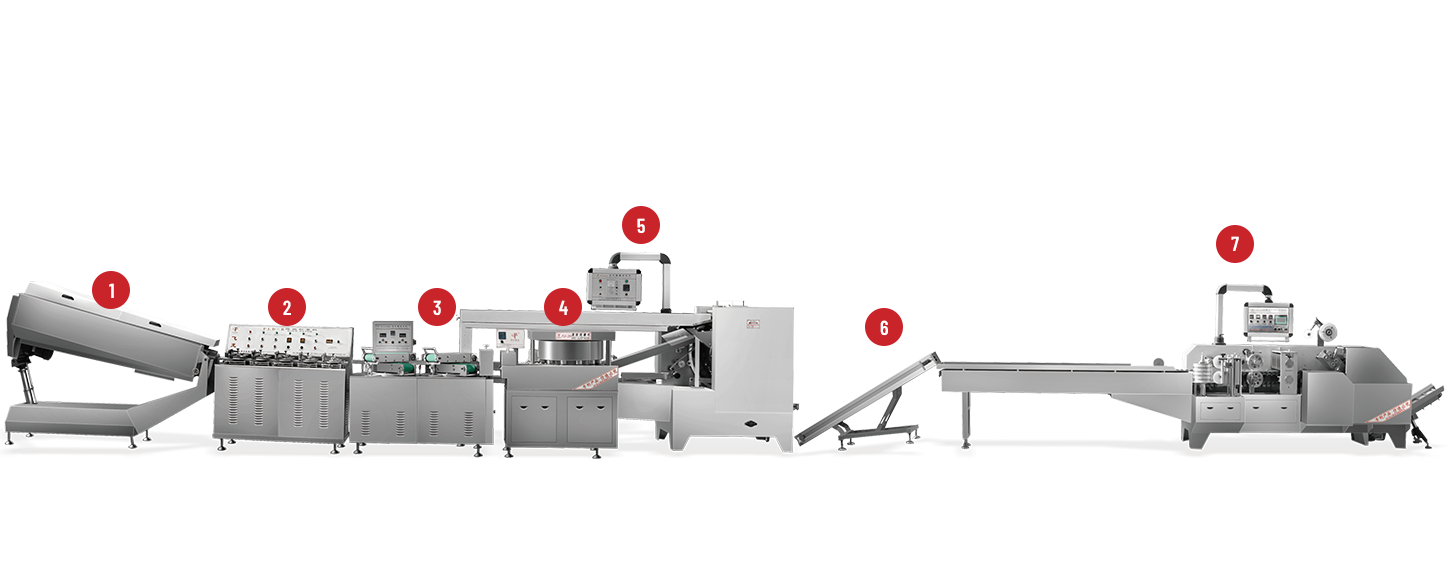
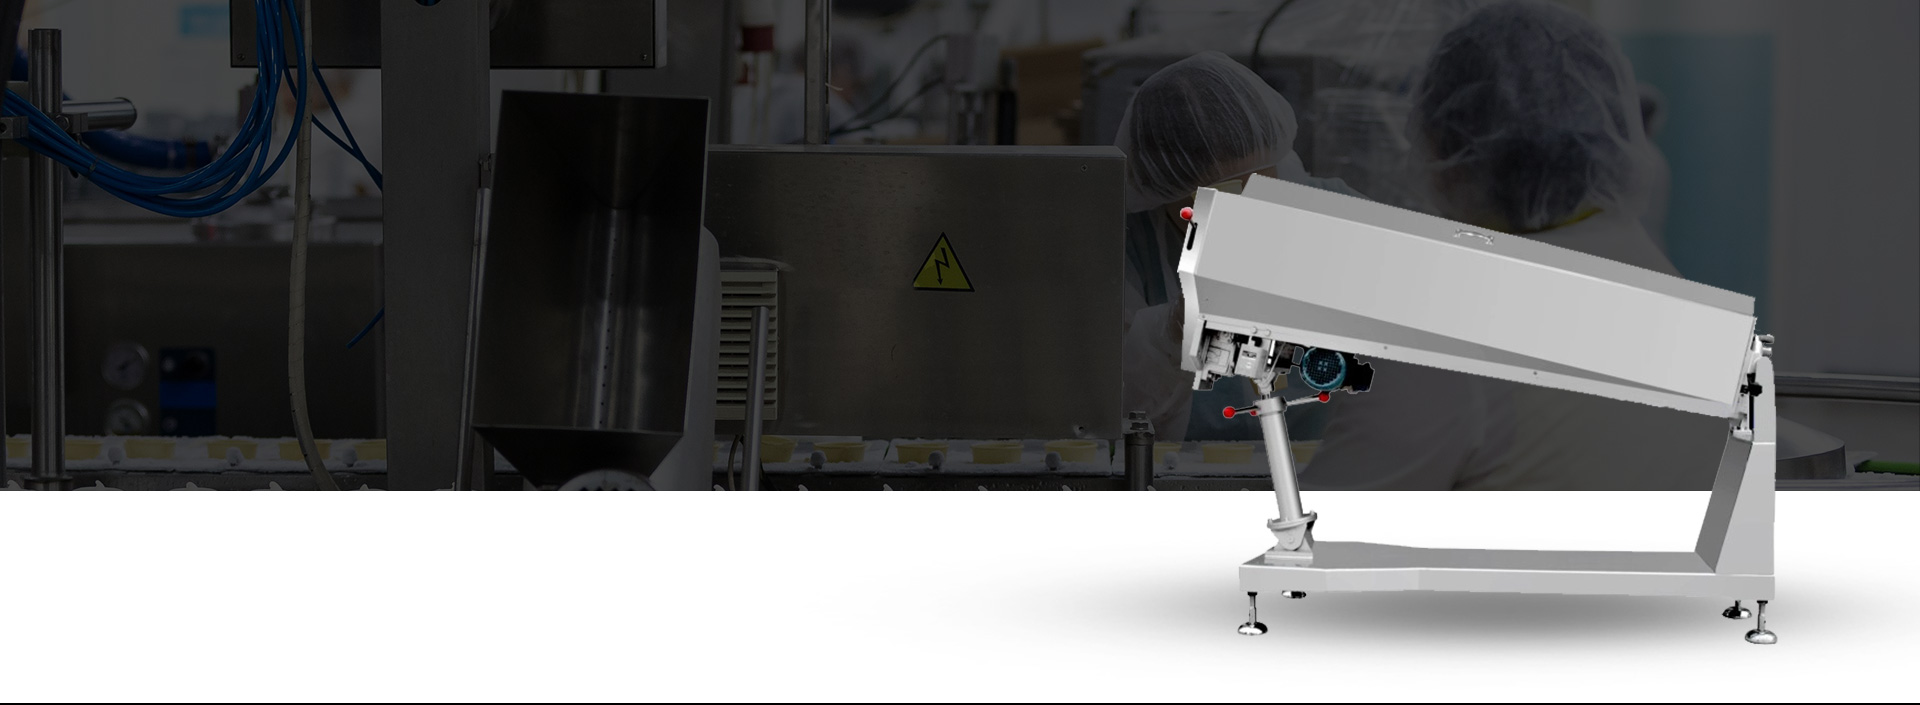
Where to place the machine in your workflow (shop layout tips)
Small kitchens are about efficient flow. Think of the machine as a station in a one-way line: ingredients in, formed pieces out, cooling, packing.
- Position the machine near ingredients and hoppers to minimize transfer steps.
- Ensure a clear path from the forming line to cooling conveyors.
- Keep packaging area downstream so operators can bag or box without backtracking.
- Allow a small service area with space to remove panels for cleaning.
If space is tight, consider a compact unit with removable parts for quick cleaning. Don't forget ventilation and a steady power source — voltage dips will annoy your day.
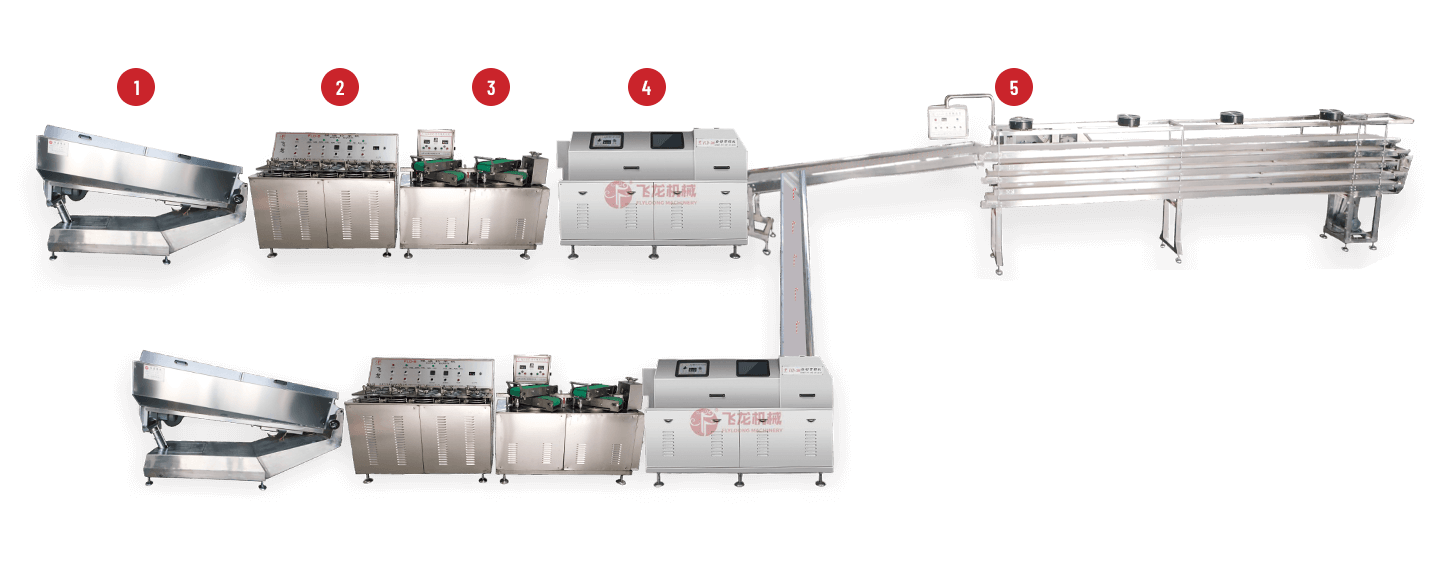
Scaling: from small batches to steady runs
If you're testing the water, rent or lease first. If you're planning growth, think about scalability.
- Step approach: buy a small machine, refine recipes and workflow, then add another identical unit when needed. Identical units mean parts interchangeability and simpler training.
- Parallel vs bigger machine: sometimes two small machines beat one big machine for flexibility and redundancy — one can stay running while the other is cleaned.
- Automation options: as you scale, consider add-ons like automated dosing, rotary forming heads, or in-line cooling and wrapping for continuous production.
Cashflow tip: plan capital expenditure around seasonal peaks — buy ahead of high season so you can meet demand rather than disappoint customers.
Buying smarter — questions to ask suppliers
Don't get dazzled by glossy spec sheets. Here's what to ask and why.
- Can I test one on my recipe? Real world testing beats brochures.
- Is training provided? A machine is only as good as the operator running it.
- How easy is cleaning and disassembly? Time saved cleaning is time saved overall.
- What warranties cover motors, electronics, and wear parts? Understand what's included and what costs extra.
Also ask for operator references — other small businesses who use that same machine can tell you more than specs.
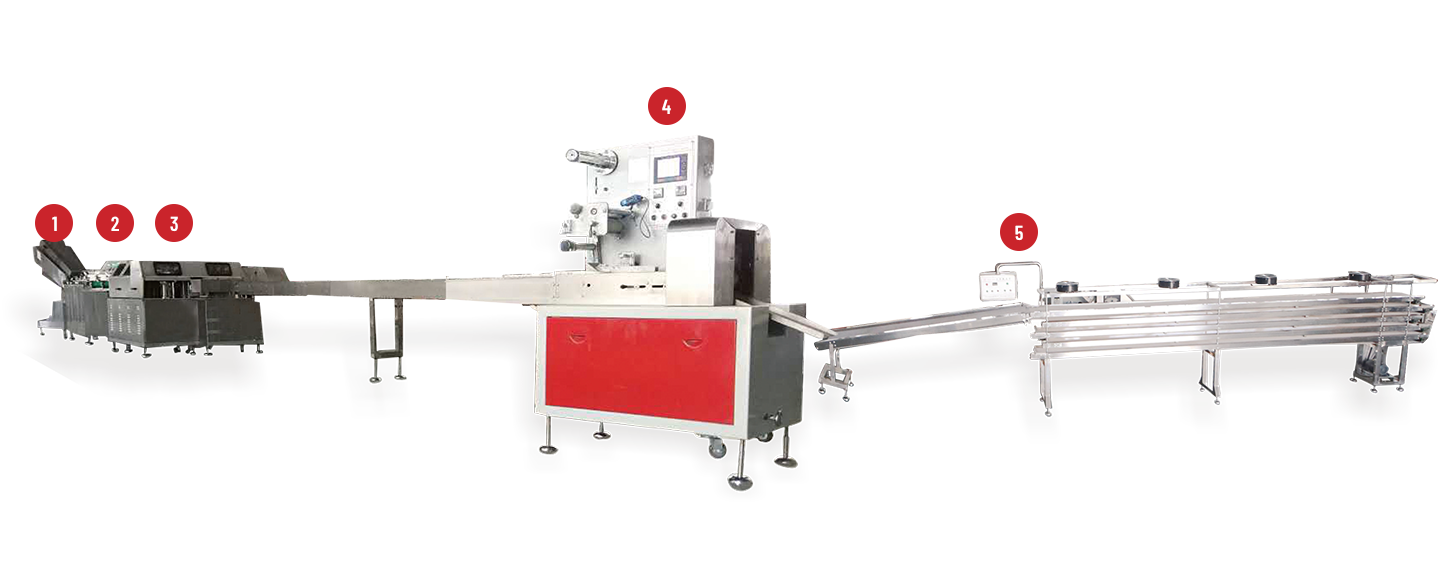
Packaging and storage — finish matters
A candy's journey doesn't end at forming. Shelf life, appearance, and protection are all packaging concerns.
- For milk-based candies, moisture is the enemy. Use moisture-barrier wraps and store in cool, dry places.
- Batch-label everything. Date, recipe code, operator initials — traceability helps with quality control and recalls.
- Consider portion packs for retail: pre-wrapped pieces preserve shine and ease distribution.
If you're shipping, test stability over the transit times and temperature ranges you expect.
Safety and regulatory basics
Food safety is non-negotiable.
- Keep the production area clean and separate from raw materials storage for non-food items.
- Follow local regulations for food contact surfaces and clean-in-place procedures if applicable.
- Maintain allergen controls if you use dairy alongside nut or gluten ingredients.
- Train staff on hygiene and PPE — an inexpensive cleanliness culture prevents big problems.
If you're new to production, a short consultation with a local food safety official or a private lab can be worth the investment to ensure compliance.
Real operator tips — what I wish I'd known earlier
- Mark your conveyor and dosing settings with permanent labels for each recipe. Saves a lot of guesswork.
- Keep a small toolkit by the machine. A few hex keys, a small brush, and a spare gasket are worth their weight.
- If something seems off with texture, don't immediately blame the machine. Ingredients, humidity, or syrup concentration often cause issues.
- Build a playlist for repetitive tasks. Sounds silly, but a comfortable operator works smarter and safer.
Quick printable checklists
Daily startup
- Visual check for leaks or debris
- Confirm temperature readouts stable
- Test 3 sample pieces for shape and weight
- Ensure waste bins empty and clean
Shutdown / cleaning
- Power down and lock out
- Remove forming nozzles and soak if sticky
- Wipe hoppers and conveyors
- Log any issues in the maintenance book
Use the machine to free up your creativity
Machines don't replace craft; they support it. A well-used Milk Candy Machine gives you consistency, saves time, and lets your team focus on recipe development, packaging design, and customer service. Start with a test, document everything, and iterate patiently. Over months you'll build a repeatable process that scales reliably, keeps customers returning, and makes your shop a smoother place to work.


 +86-(0)515-8465666
 +86-(0)515-85566996
 +86-138 1559 9708
 flyloong@flyloongcn.com
 Home
Home